Windows computer not recognizing Motorola Moto G53s Phone? Or Motorola Moto G53s android phone won’t connect to the PC? It can be the result of missing Motorola Moto G53s USB drivers or bad or corrupted drivers. To fix Motorola Moto G53s Android phone not showing up on PC, download the Motorola Moto G53s USB driver and install it on your computer.
Motorola USB drivers are essential to efficiently connect Motorola Moto G53s to Computer and Laptop using a USB cable. On this page, we have managed to share the official Motorola Moto G53s USB driver for Windows 11, Windows 10, Windows 7, Windows 8.1, and Windows 8. Apart from the official USB Driver for Motorola Moto G53s, we have also shared Motorola Moto G53s ADB interface drivers and Fastboot drivers.
The Motorola Moto G53s Android USB driver allows you to connect your phone as an MTP USB device (Media Transfer Protocol) to the computer so that you can transfer images, videos, documents, and other files between the phone and computer. Thus it will fix the android file transfer not working issue.
The Motorola Moto G53s ADB driver and Fastboot driver allow you to pass ADB and Fastboot commands from the PC to perform certain operations on your phone.
Download Motorola Moto G53s USB Driver
The Motorola mobile drivers offered here can be used to flash stock firmware, stock recovery, TWRP recovery, CWM Recovery, Unlocking Bootloader, etc. It can also be used for general purposes like transferring media and files to and from mobile to PC.
Motorola Moto G53s Driver for Flashing Firmware
How to install: Follow Tutorial
How to install: Follow Tutorial
Download Motorola Device Manager Latest Version
Motorola Moto G53s USB Driver for normal connecting to PC
How to install: Follow Tutorial
The Motorola Moto G53s Fastboot and ADB drivers can be downloaded below.
Motorola Moto G53s ADB and Fastboot Drivers
How to install: Follow Tutorial
[!] Note: If you face Driver Signature Error while installing the USB Driver, then watch this video to fix the problem.
Also Download: Motorola Moto G42 5G USB Drivers
How to Install Motorola Moto G53s USB Drivers
- Download and extract the Motorola Drivers package on your computer.

- After extracting the driver package, you'll get the Motorola USB Drivers setup file.
- Run the Motorola USB Driver setup file on your computer.
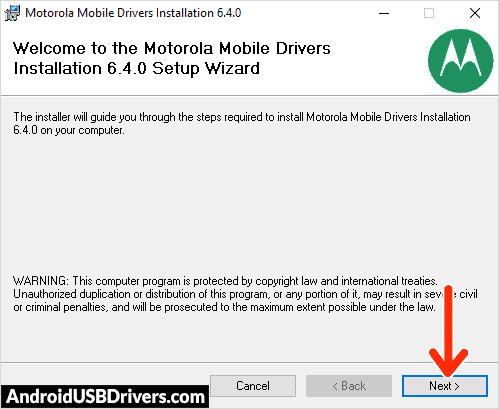
- Motorola Mobile Drivers Installation window should open.
- Click on Next to continue.
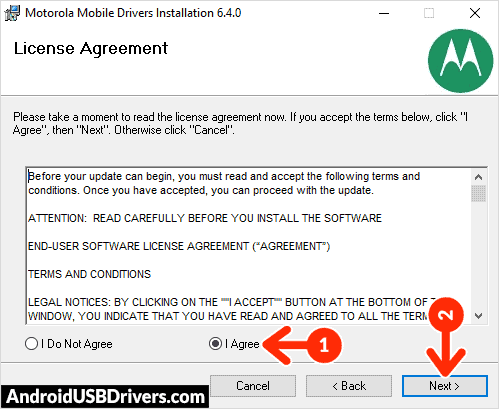
- Now agree with the License Agreement by selecting "I Agree" and click on Next.
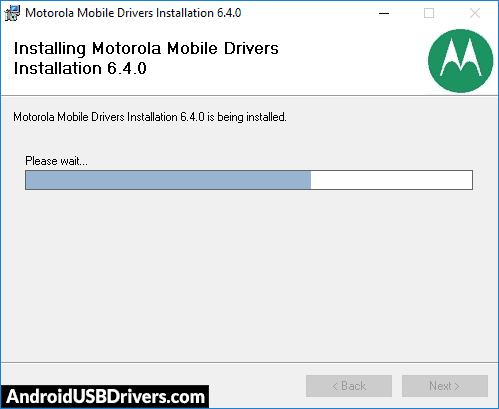
- Moto USB Drivers installation process should begin.
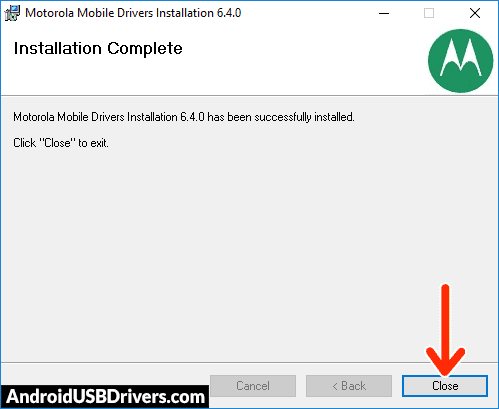
- Once the Motorola Phone Drivers installation is completed, click on Close to exit the setup.
- Now reboot your computer.
- Now you are ready to connect your Motorola Mobile Phone or Tablet to the computer through USB and use any Motorola software like Motorola Device Manager, RSD Lite Tool, etc.
How to Install Motorola Moto G53s USB Drivers Manually
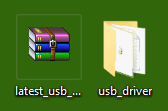
- Download and extract the latest_usb_driver_windows.zip to Desktop on your computer.
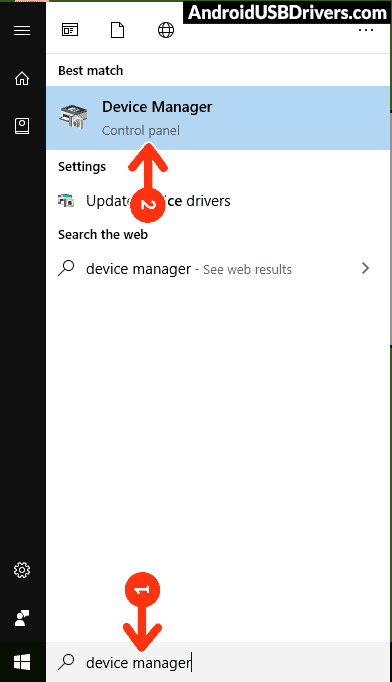
- Open the Device Manager on your computer by searching device manager (devmgmt.msc) from Windows Start Menu.
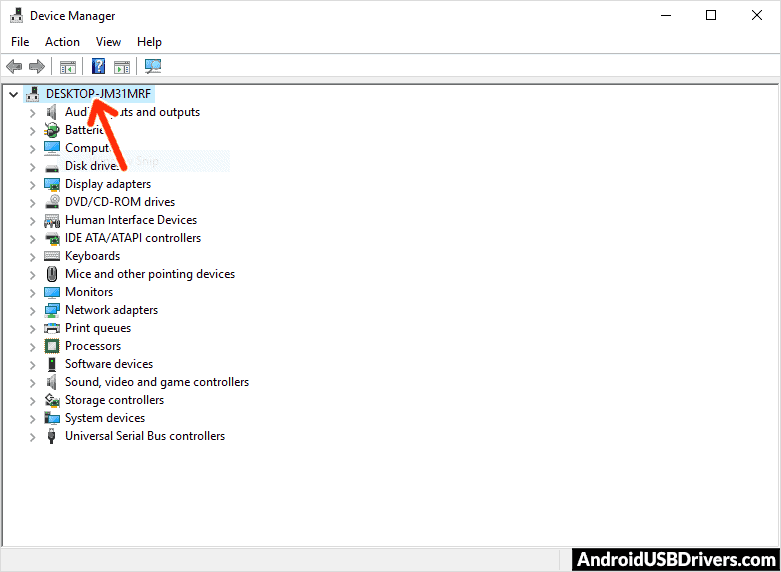
- When the Device Manager window opens, click on your Computer name.
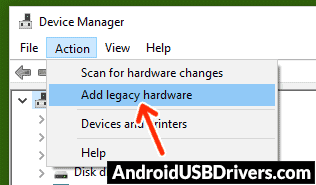
- Now click on Action and then click on Add legacy hardware.
- Now Add Hardware Wizard window should open. Click on Next to continue.
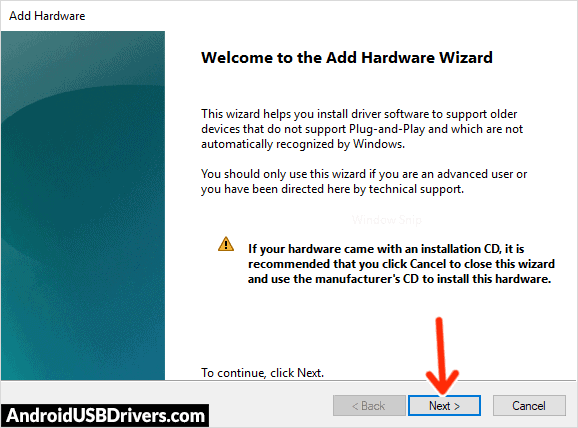
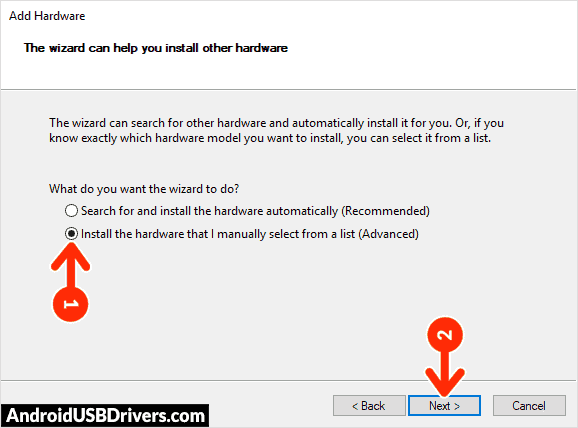
- Now select Install the hardware that I manually select from a list (Advanced) option and click on Next.
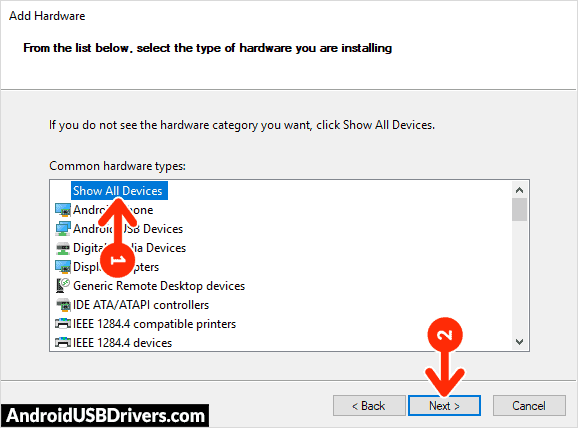
- Now click on Show All Devices from the list and click on Next.
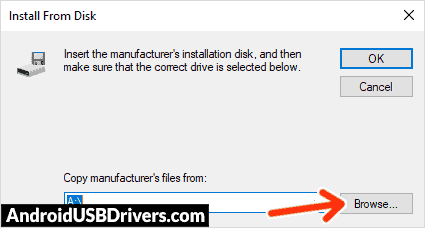
- Now click on Have Disk… to open the Install From Disk window.
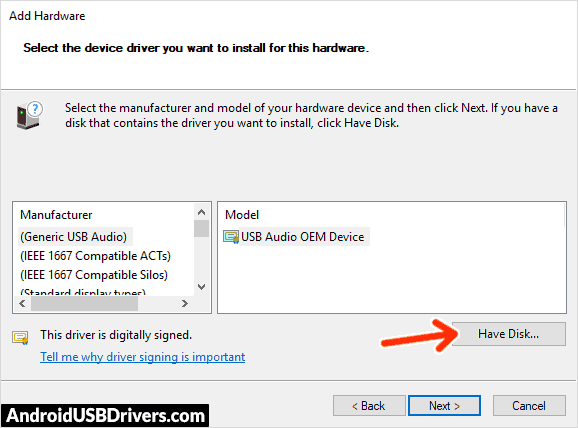
- In the Install From Disk window, click on Browse… and navigate to the folder where you have extracted the drivers in Step #1.
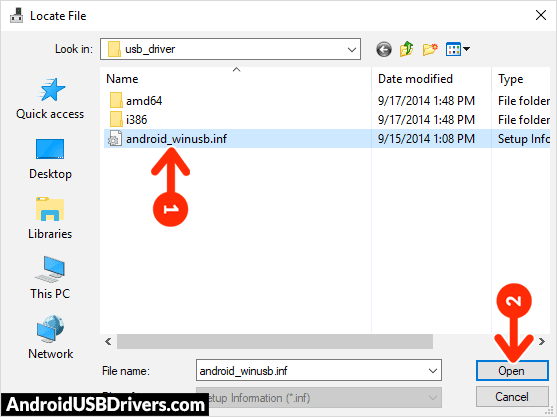
- Now select android_winusb.inf driver file and click on Open and then on OK.
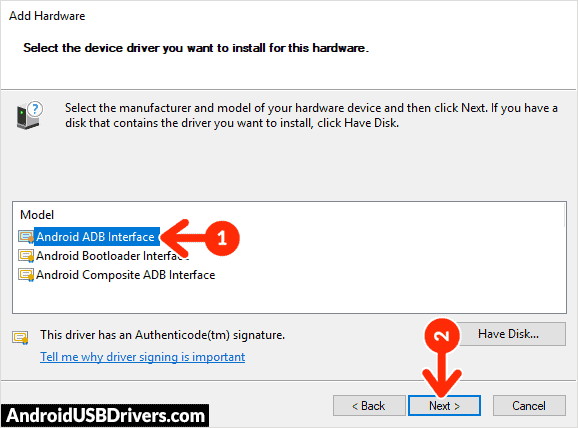
- Now select the Android ADB Interface driver from the list and click on Next.
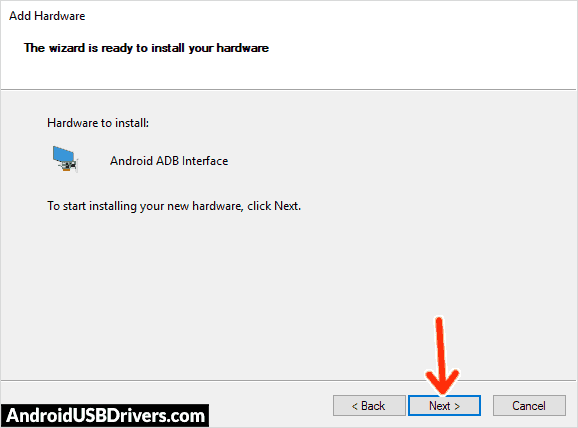
- In the next screen, confirm the Hardware driver to install and click on Next to begin the installation process.
- Once installed, click on Finish.
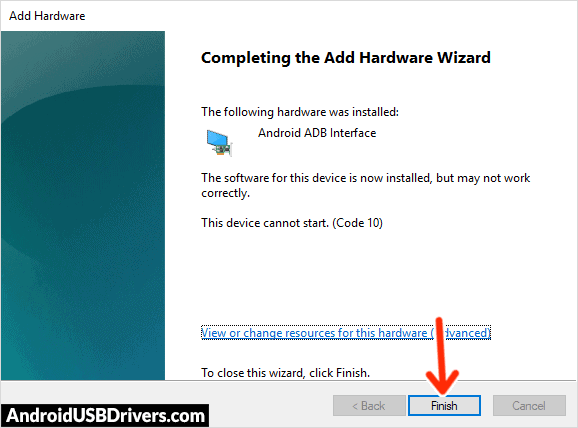
- Follow Steps #3 to #13 again and install the Android Bootloader Interface driver and Android Composite ADB Interface driver.
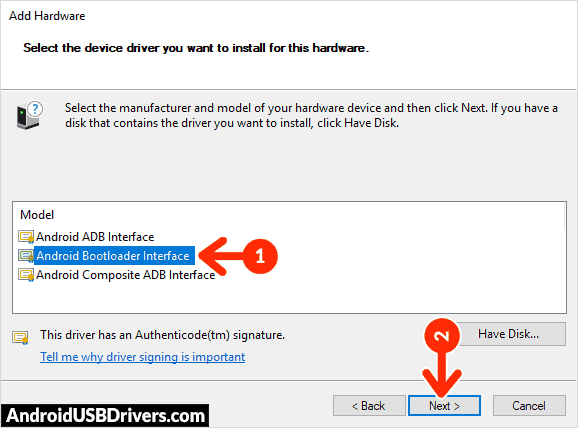
- Once all the listed drivers are installed, reboot your computer.
Video Tutorial: How to Install Motorola Moto G53s Android USB Drivers
How to Install Motorola Moto G53s ADB and Fastboot Drivers
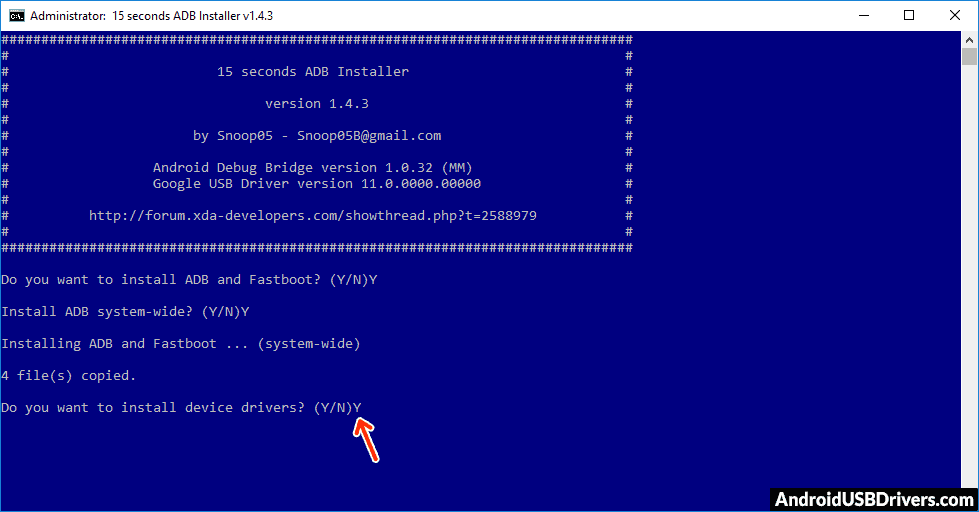
- Download and extract the 15 seconds ADB installer zip package on your computer.
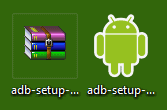
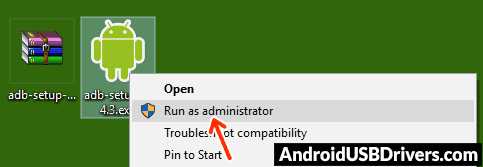
- Now right click on the adb installer setup exe file and click on Run as administrator.
- Now a command prompt window should open.
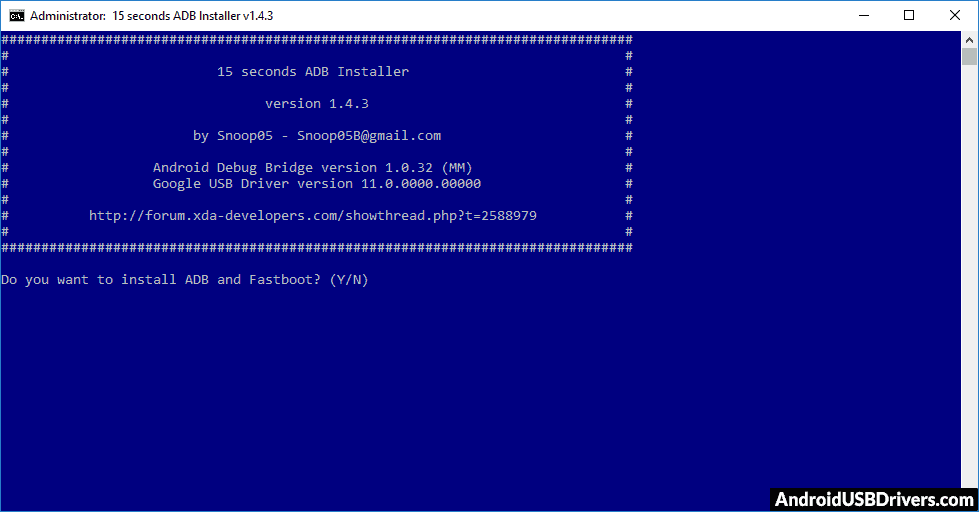
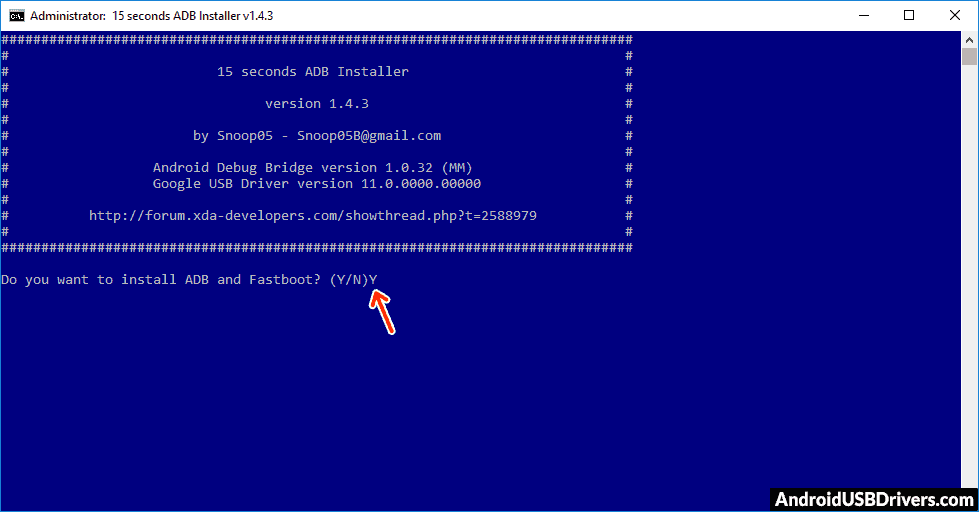
- It should say, Do you want to install ADB and Fastboot? Press the Y key on your keyboard and hit Enter.
- When it says, Do you want to install ADB system-wide? Press the Y key again and hit Enter.
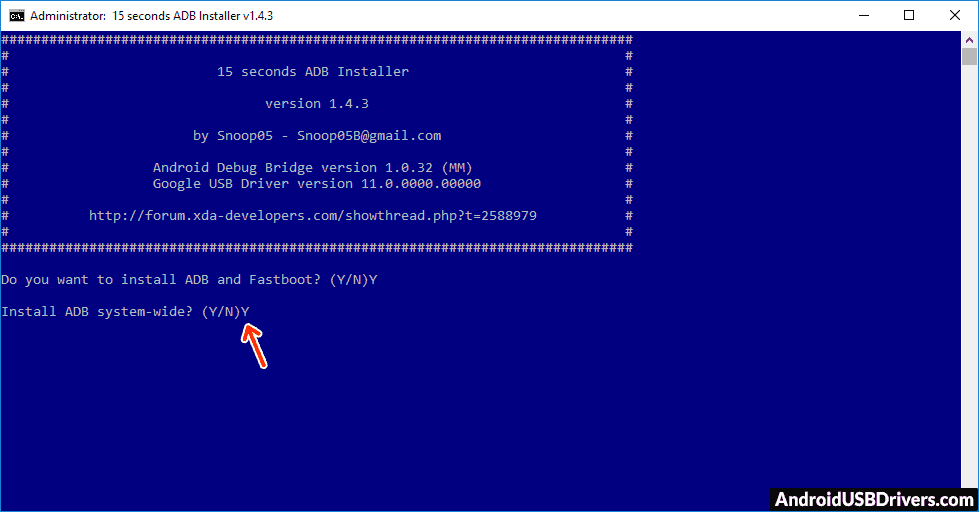
- Now, the ADB driver and Fastboot driver installation process should begin.
- When finished, it should say, Do you want to install device drivers? Press the Y key and hit Enter.
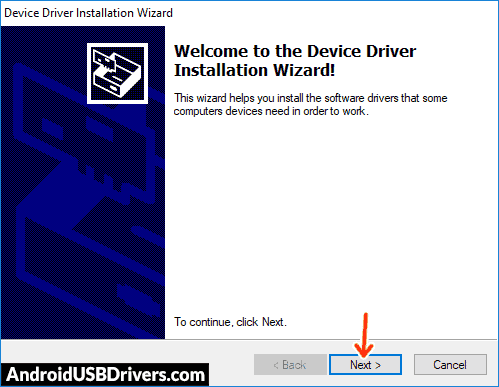
- Now the "Device Driver Installation Wizard" window should open.
- Click on Next to install the Google USB Drivers (WinUSB).
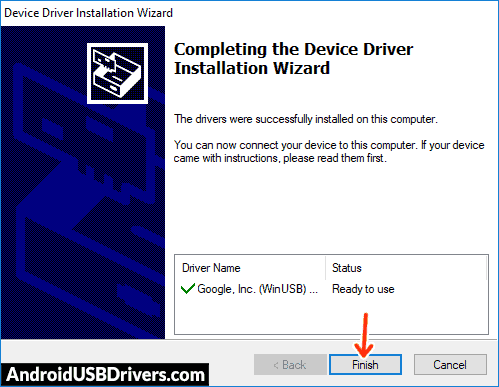
- Once installed, click on Finish and restart your computer.
Video Tutorial: How to Install Motorola Moto G53s ADB and Fastboot Drivers

Important Notes:
[*] Driver Signature Error: If you got Driver Signature Error While installing the Driver then See this Video to fix this problem.
[*] Broken link: Report here.
[*] Have we missed any device model? Let us know by contacting us via Contact Us page.
LEAVE A REPLY